Did you ever want a quieter graphics card? Or did you have one that was running perfectly fine until a fan broke, making it overheat all the time? If you searched for a solution, you stumbled maybe already over the Raijintek Morpheus II Core Edition, its predecessors or one of the few alternatives.
The Morpheus II is an aftermarket gpu cooler. Its promise is that by replacing the regular gpu cooler with this very big heatsink and strapping two 120mm case fans on top of it you end up with a less hot and quieter graphics card. The fans you have to buy yourself, the idea is to use regular case fans. The cooler supports a TDP of 360W, which is a lot.
It is not cheap though. I bought it myself at caseking for 64.90€, in the US the best offer I see right now is for $67.99 at newegg.
The question is: Is it worth it?
To decide that I will show how I installed the cooler plus fans on a Sapphire Pulse RX 580, a card that was before that installation very loud and ran too hot. I measured temperature before and after, and made recordings of the noise difference.
A closer look
The Morpheus II Core Edition does not seem to differ much from the regular Morpheus II. It is black, that’s all, apart from that the content of the box seems to be the same.
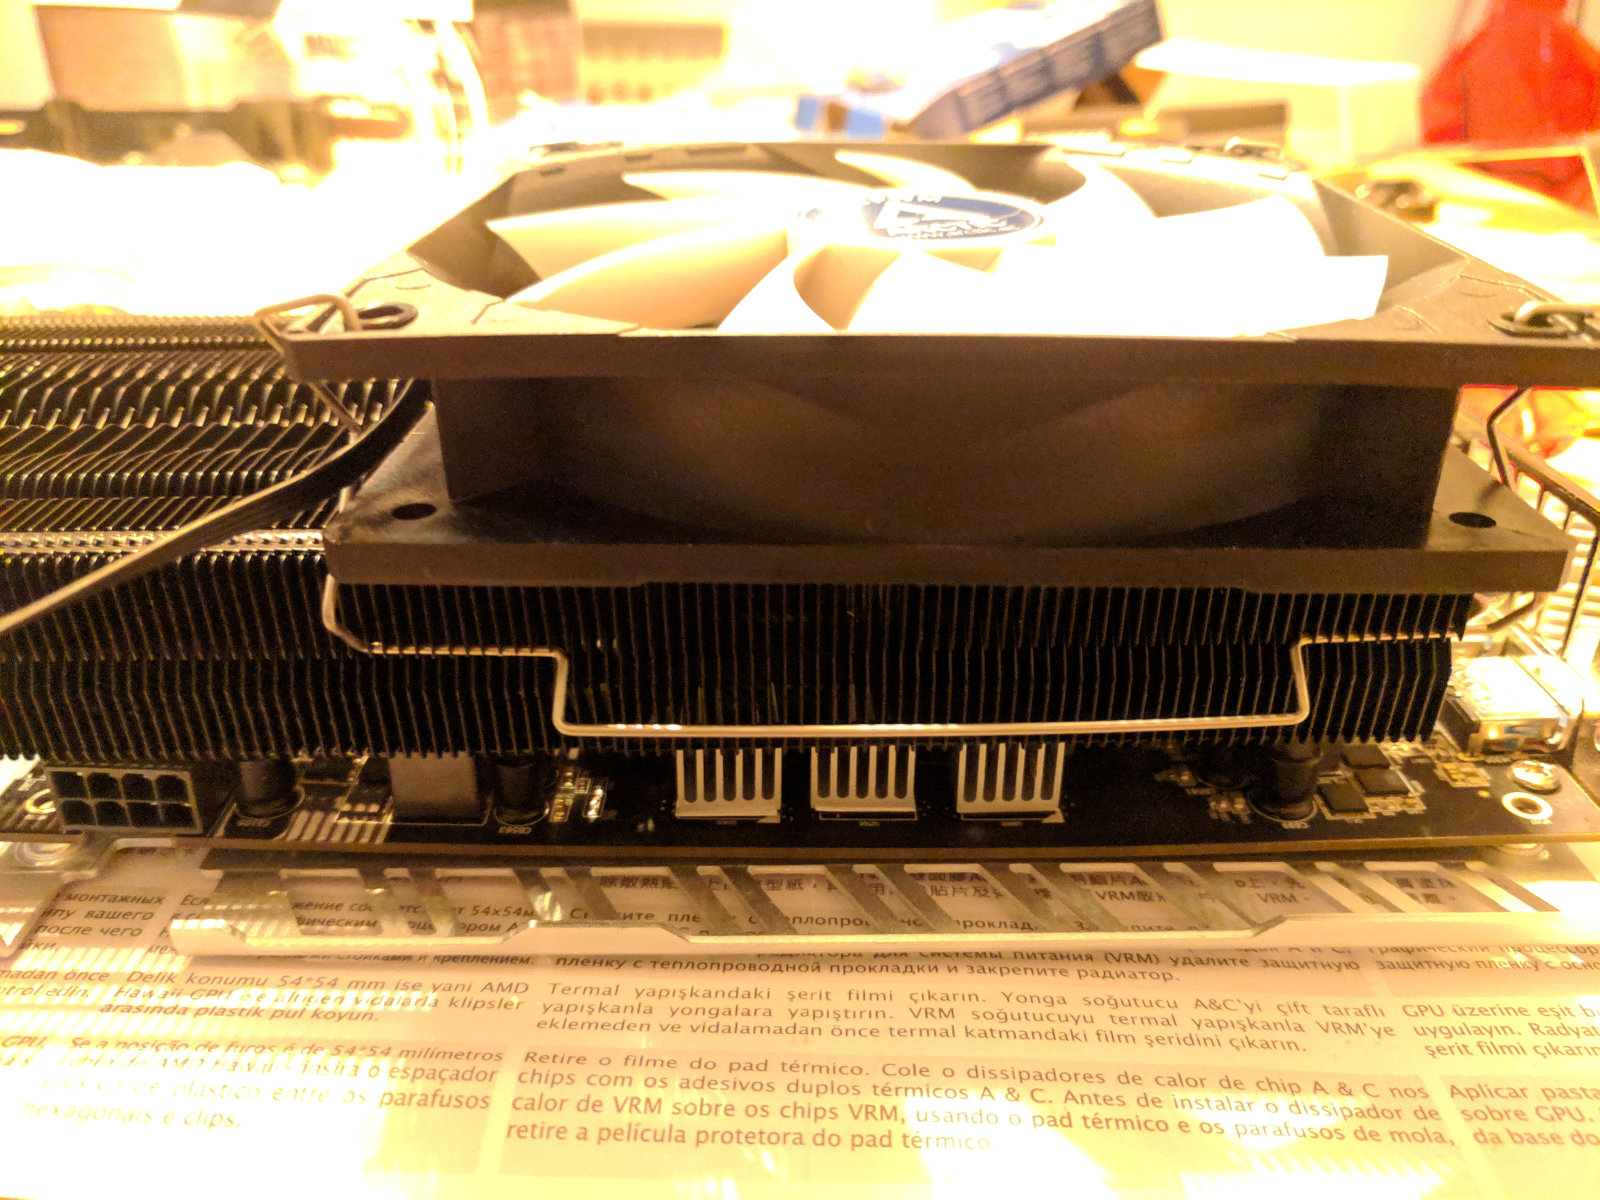
There is for one the heatsink itself:
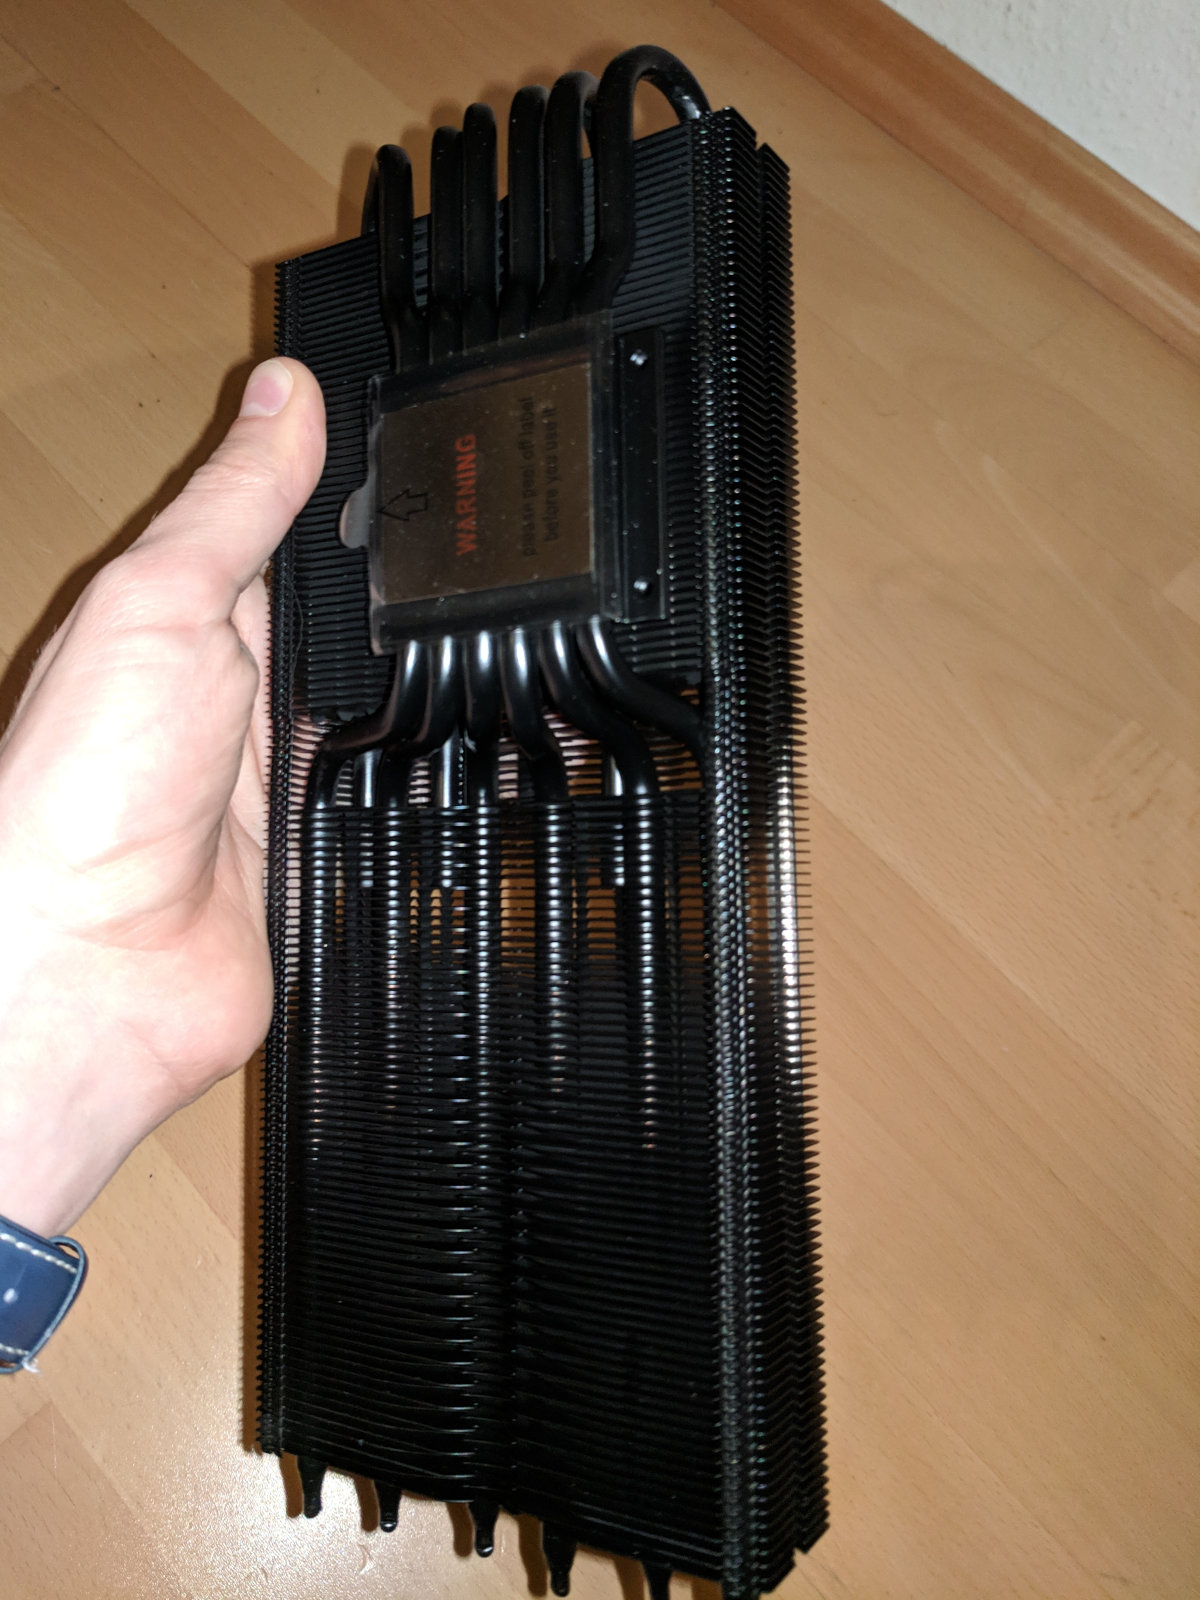
It is not small, but less heavy than I expected. For the gpu that is good news, a too heavy cooler can lead to gpu sag.
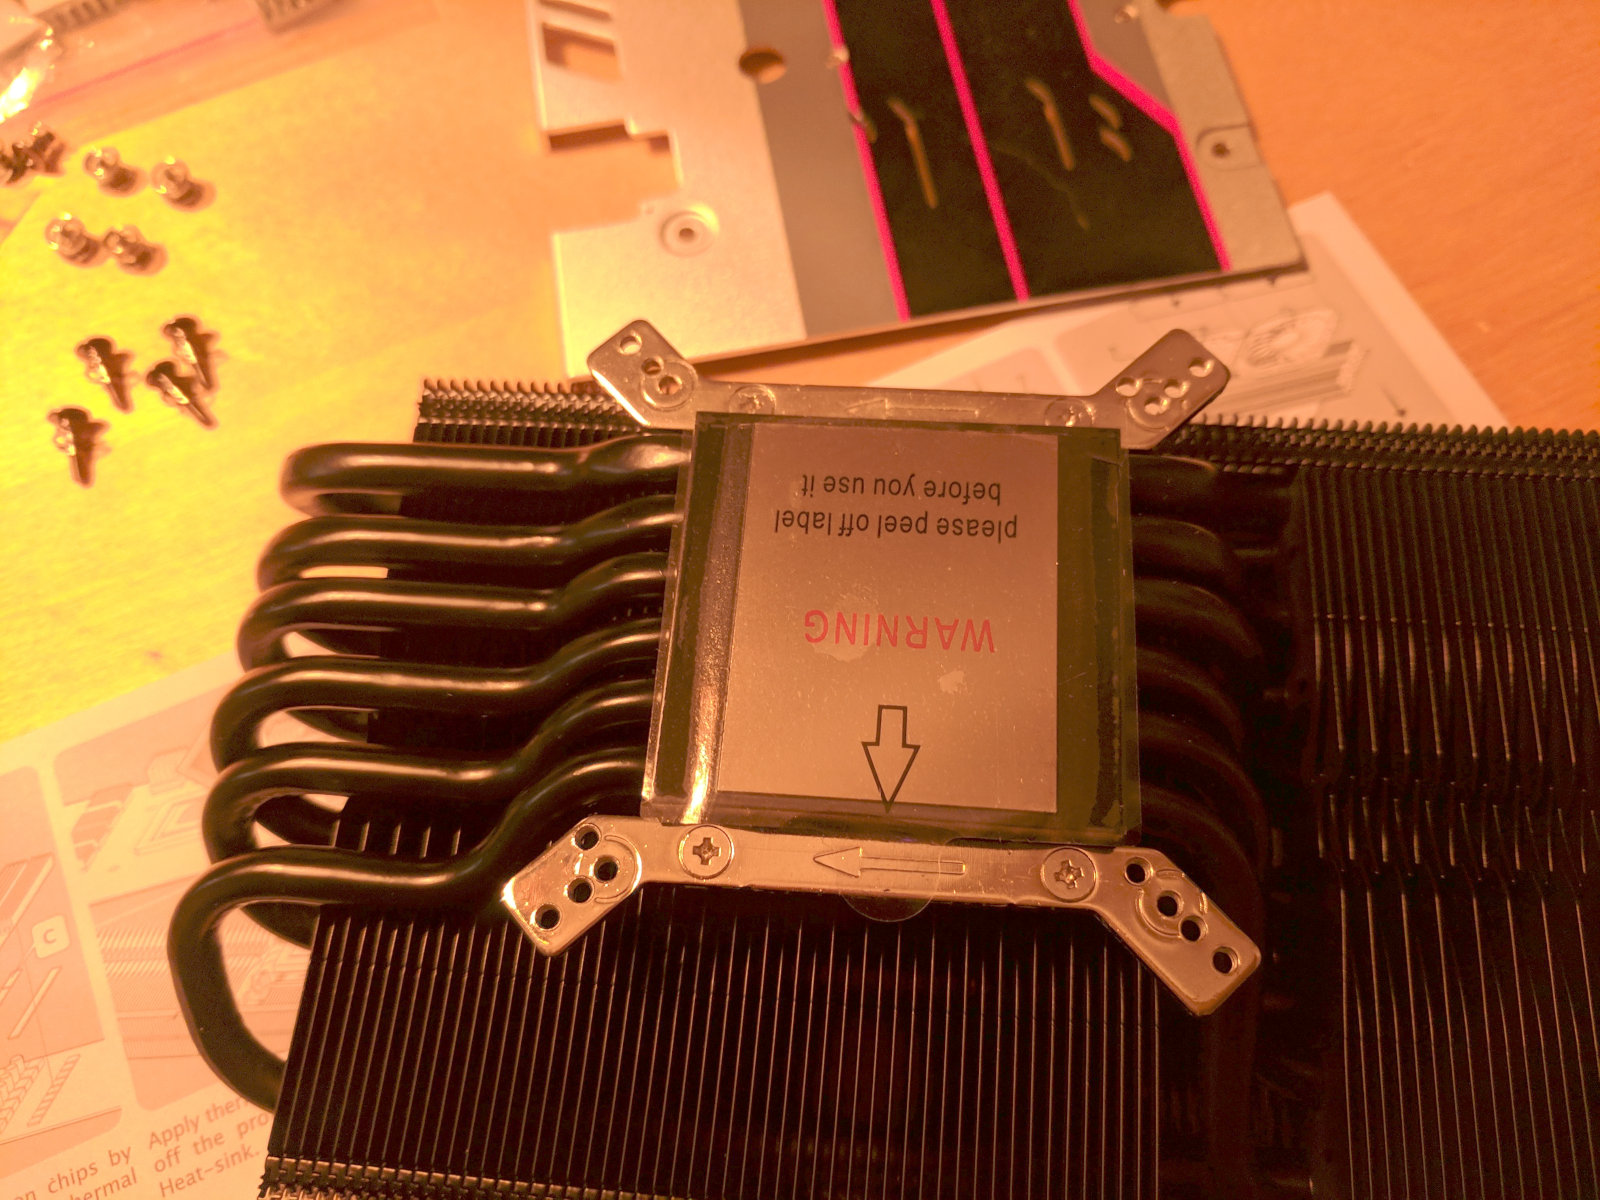
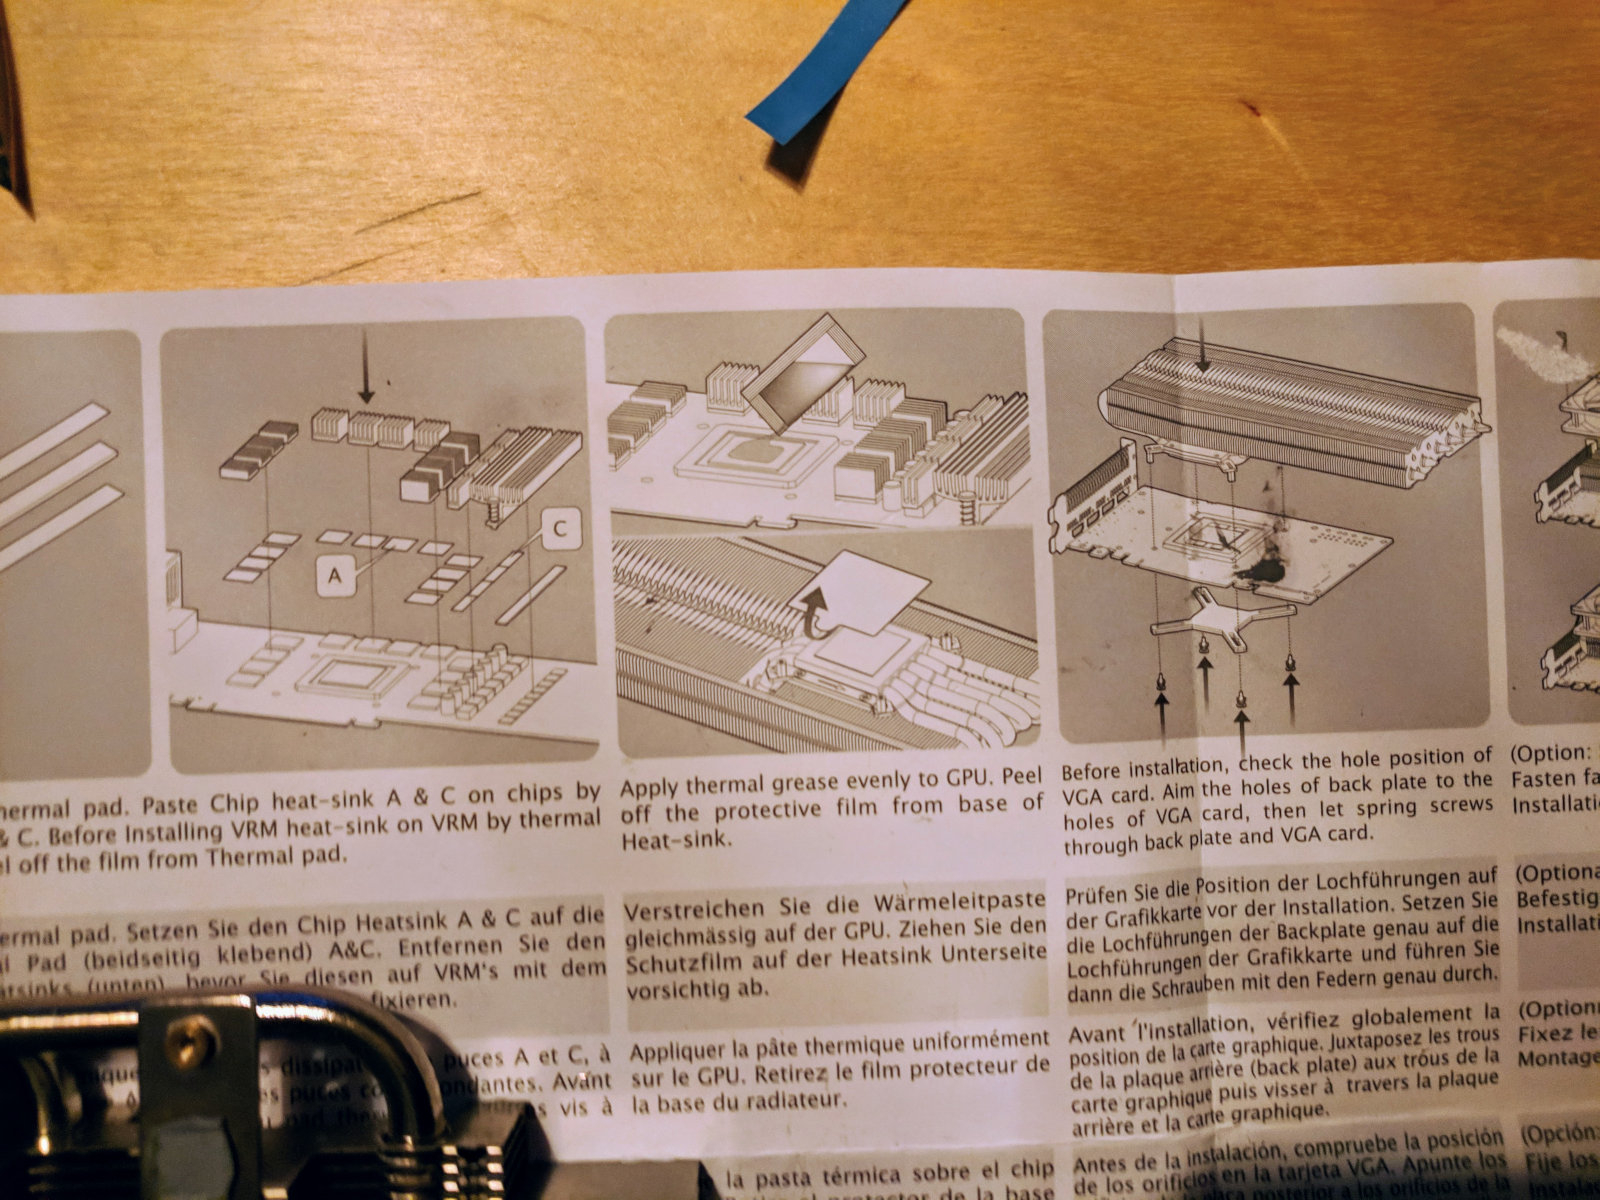
Additionally included is a manual, a bunch of small heatsinks with double sided tape, thermal paste, some screws, a metal holder for the screws at the back of the gpu, a slightly bigger VRM cooler plus fitting heatpads, metal brackets that act as connectors between gpu and heatsink as well as fitting coupling nuts, and metal brackets for the fan installation.
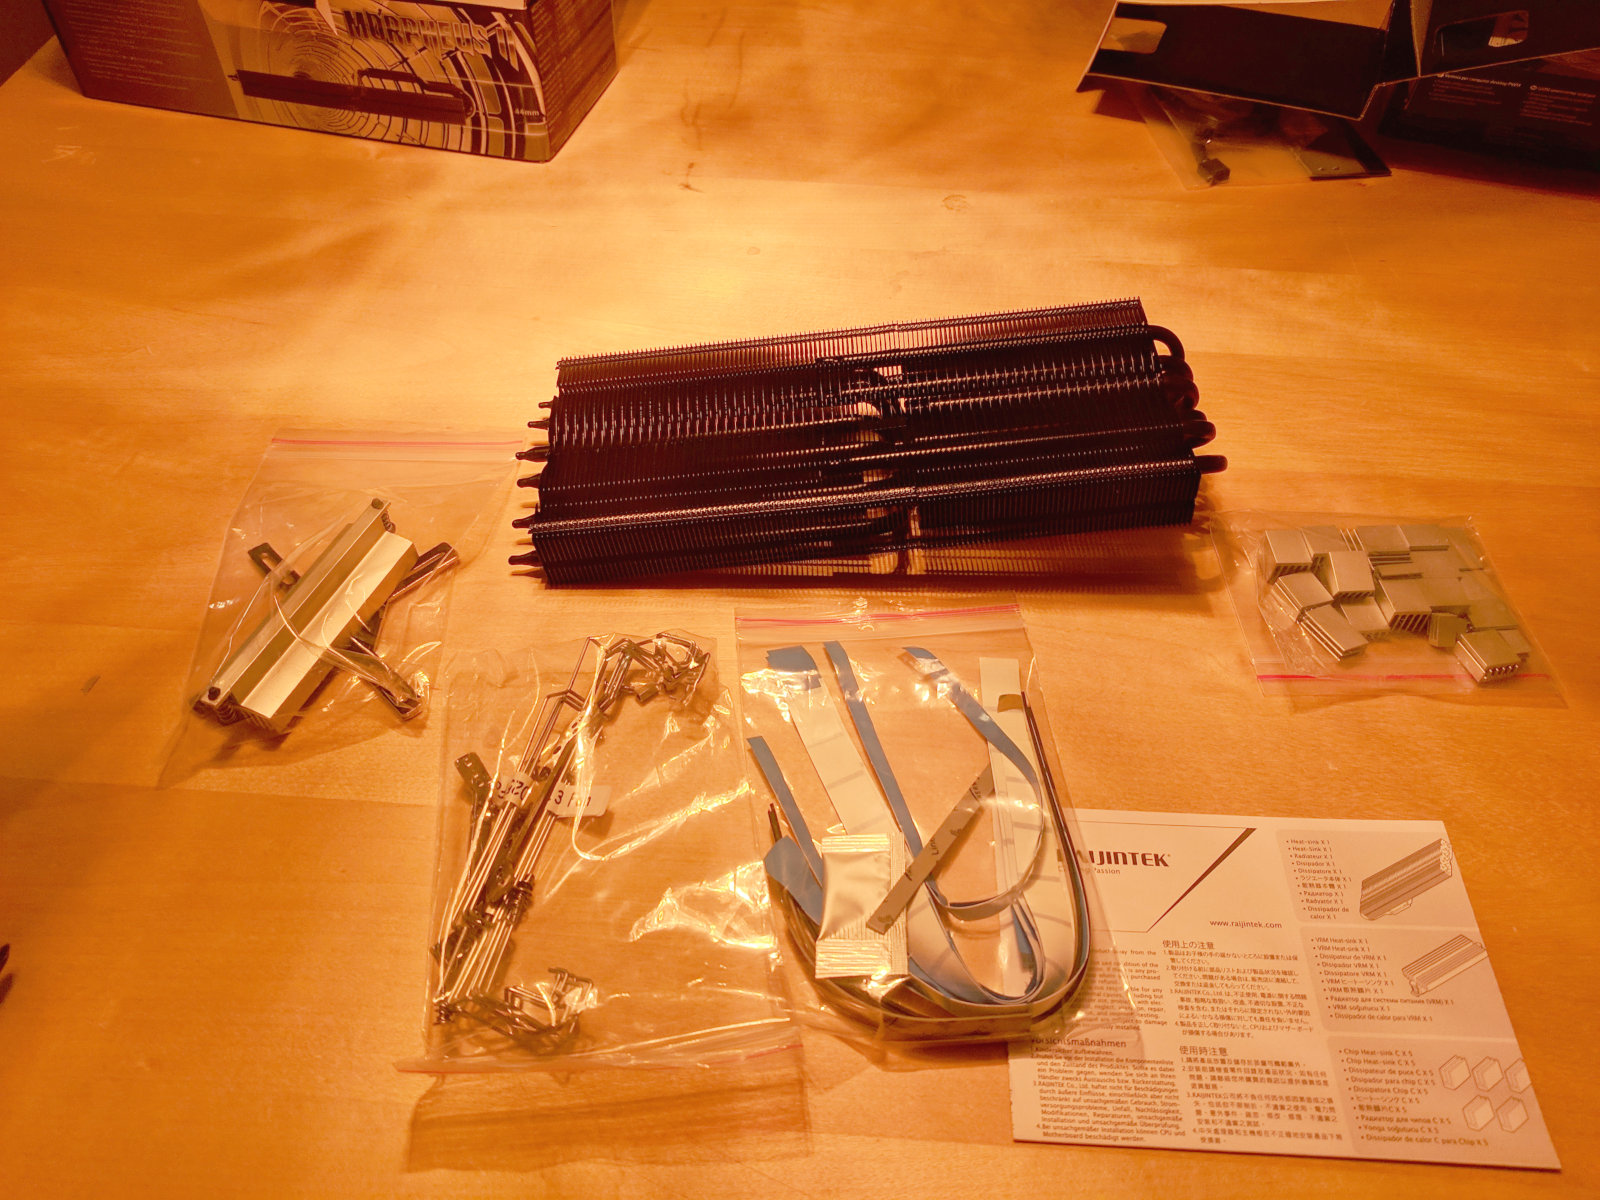
There is also black tape that the manual calls fan tape, I figured it goes between the fans and the heatsink and is meant to minimize the travel of vibrations, reducing noise.
What is missing from the box are the fans. The Morpheus II comes without fans, but it should definitely be combined with two of them to properly move the heat away from the heatsink and also to cool the VRM. I opted for two Arctic F12 PWM Rev 2 case fans. Those fans are not the strongest on the market, but one of the cheaper options. In my opinion they cool sufficiently well and stay quiet enough. Though I was not sure whether they would work well behind a heatsink like this.
I also had to buy a PWM Y-splitter, and a VGA PWM adapter cable to connect that splitter to the 4-pin fanslot of the gpu. That way the gpu can directly control the speed of the fans based on its temperature.
Installation
I should preface this section with a warning: The installation of this cooler takes time and is not easy. It is made harder than it needs to be by the manual, which is just very bad and incomplete. Removing the stock cooler will void the warranty, at least for most brands (exceptions are EVGA, XFX in the US, and also MSI claims to not void warranty when exchanging the cooler). Knowing that there most likely is no warranty in case something goes wrong will make the installation more stressful.
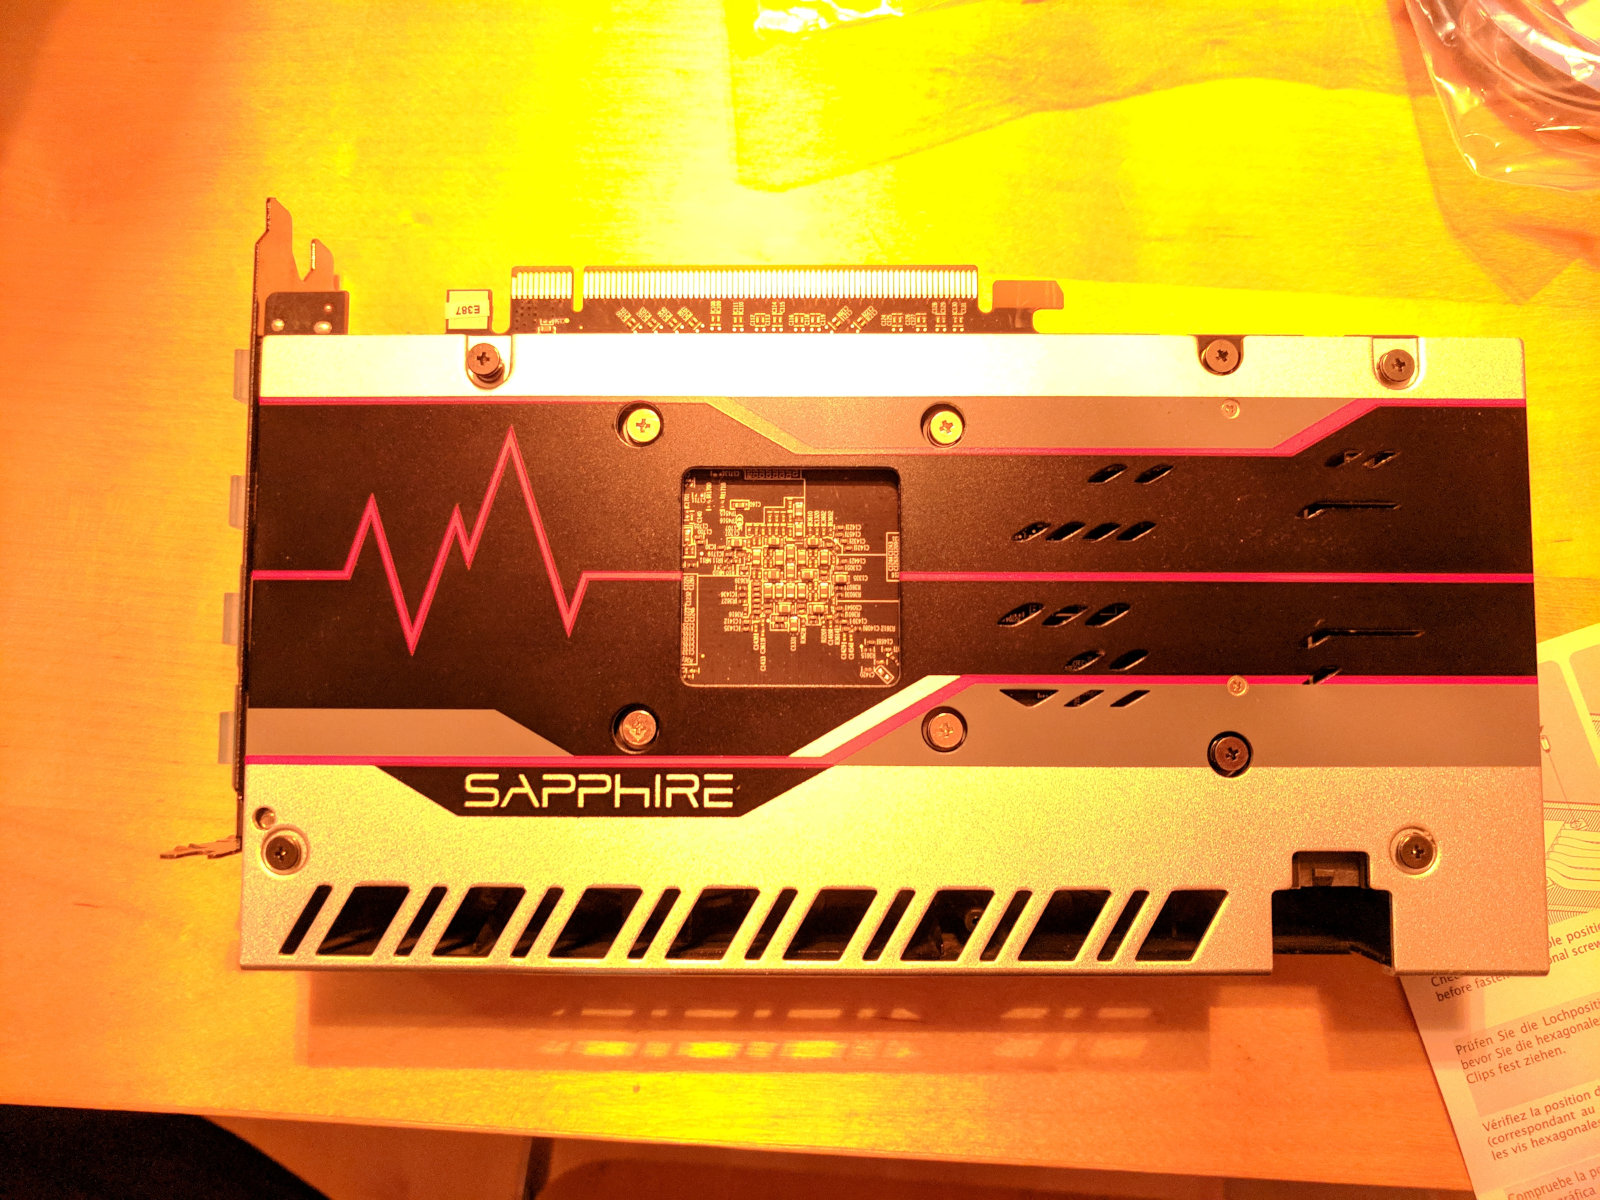
I started by removing the screws at the back of the gpu. That way the plastic shroud holding the fans can be removed, also the stock heatsink that normally sits below. The backplate can at this point be removed easily as well.
It was very hard to disconnect the fan cable, I had to use force to succeed here and was very worried that I just broke the fan header. But nothing bad did happen to it.
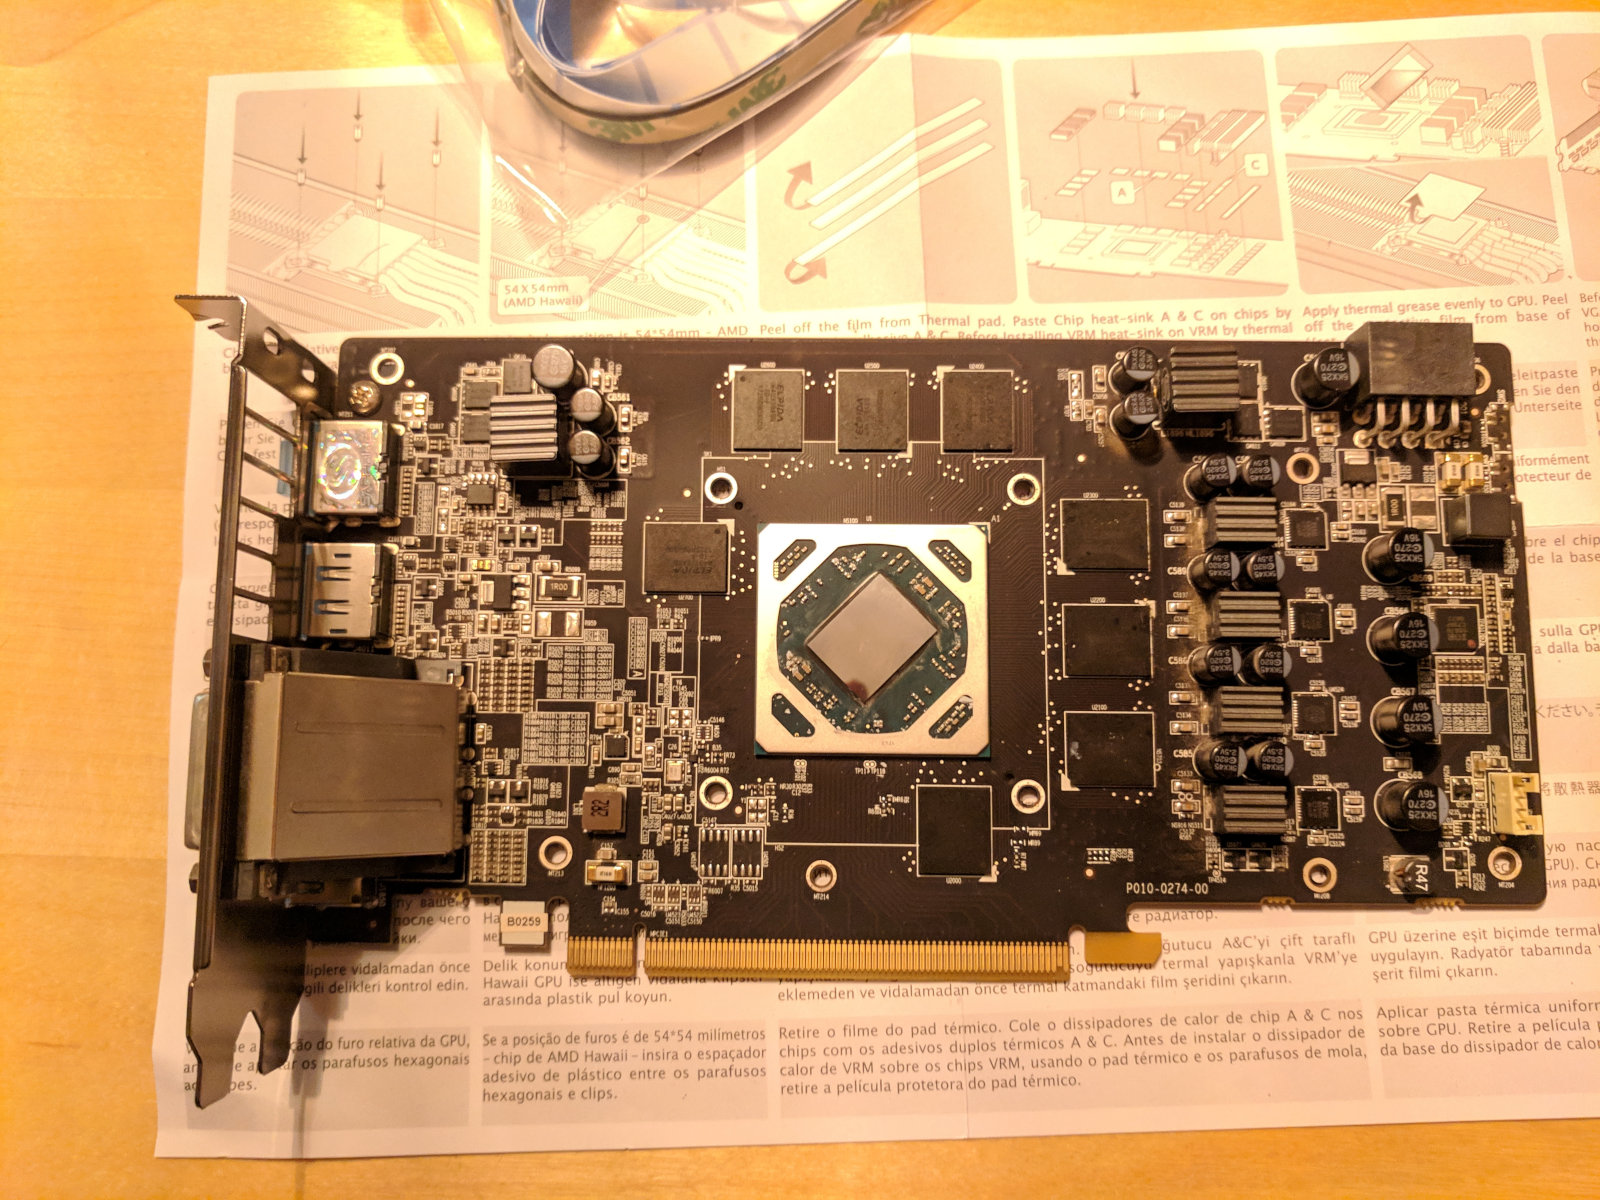
Doesn’t the bare card look unusual, without all the usual stuff around it?
The brackets that get screwed to the heatsink should be installed now. You see that there are several holes at the end, this is where the heatsink will be connected to the gpu later. Depending on the gpu a different combination of holes needs to be used then, for now just install the coupling nuts there.
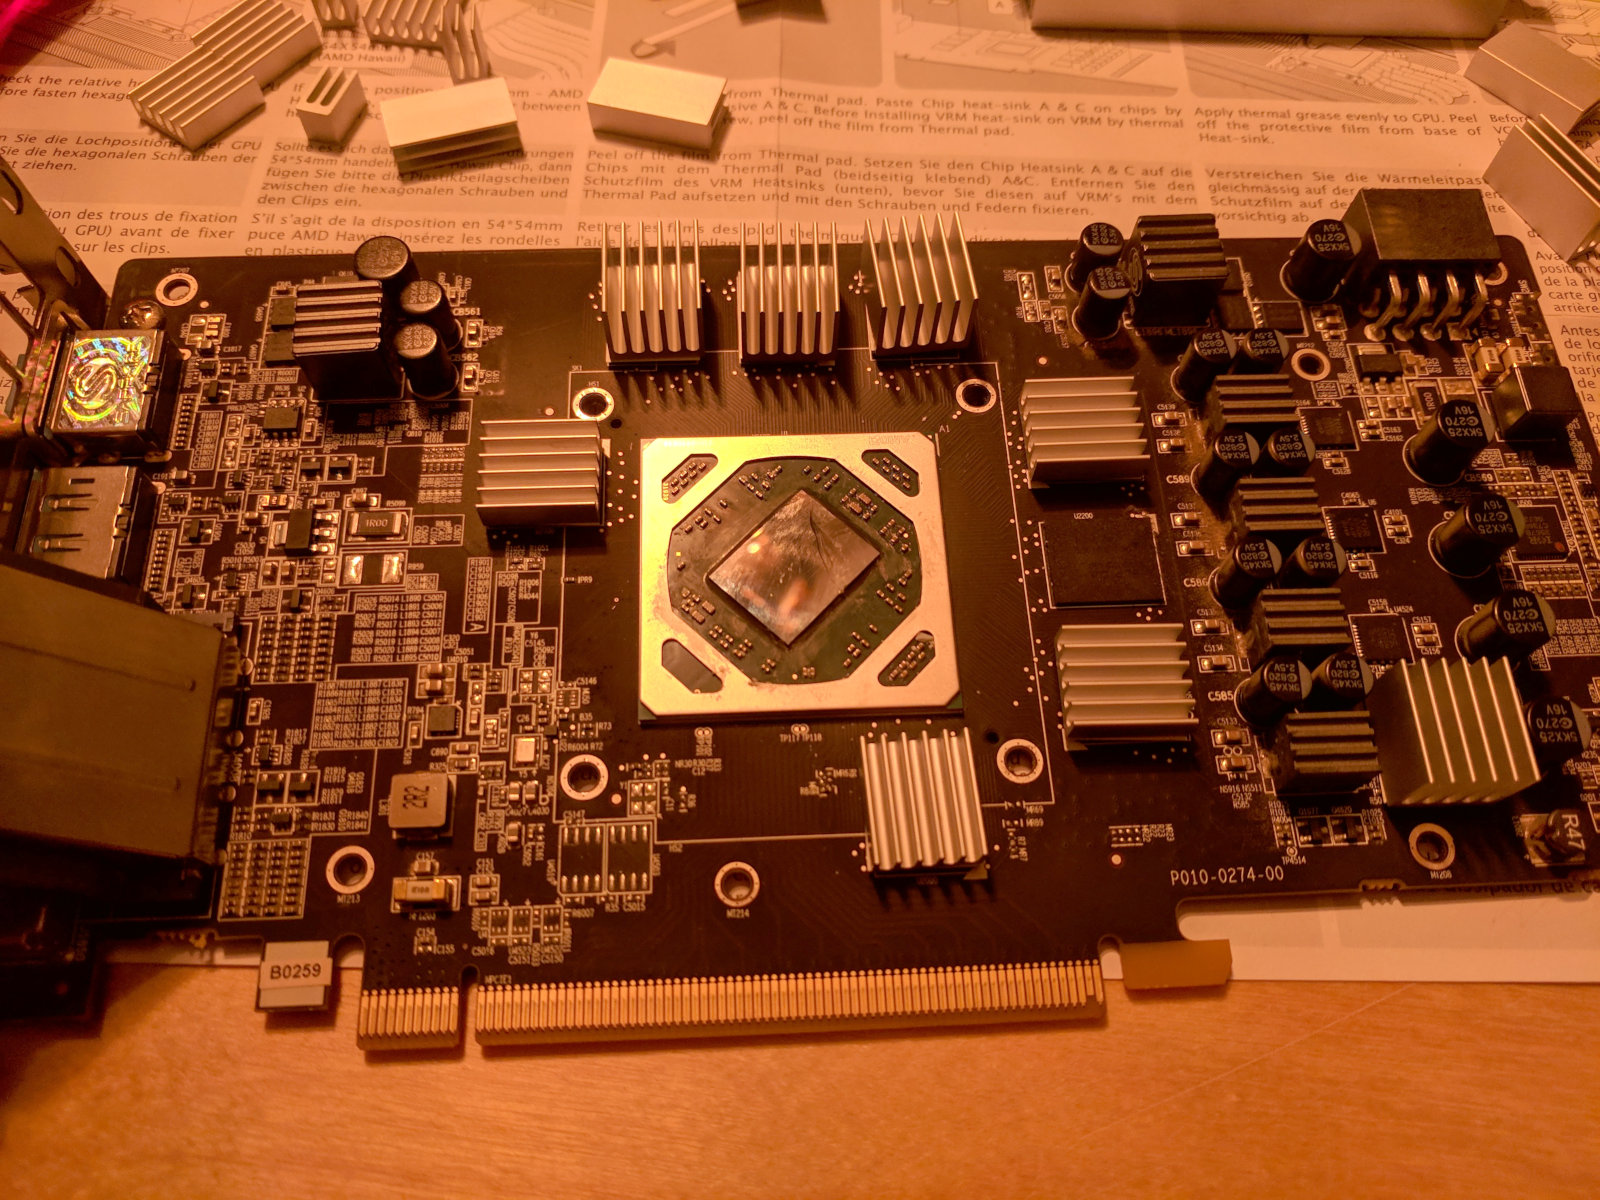
Now the small heatsinks (sometimes also called heatspreaders) can be installed on top of the gpu. The manual is not very clear about where they have to be installed. It is a good idea to look at the original cooler for that: The Sapphire Pulse RX 580 for example has thermal pads on the heatsink where it will touch the Vram modules around the core of the card. Its heatsink also covers the VRM, again with thermalpads making the connection.
The small heatsinks can be glued with the included double sided (thermal) tape on top the Vram modules. Careful: Some of them need to be covered by the smaller heatsink or the Morpheus cooler will later not fit on the core.

One Vram block I even had to cover with some thermalpad and move the heatsink to the far side of the gpu core, otherwise the Morpheus heatsink would not have fit.
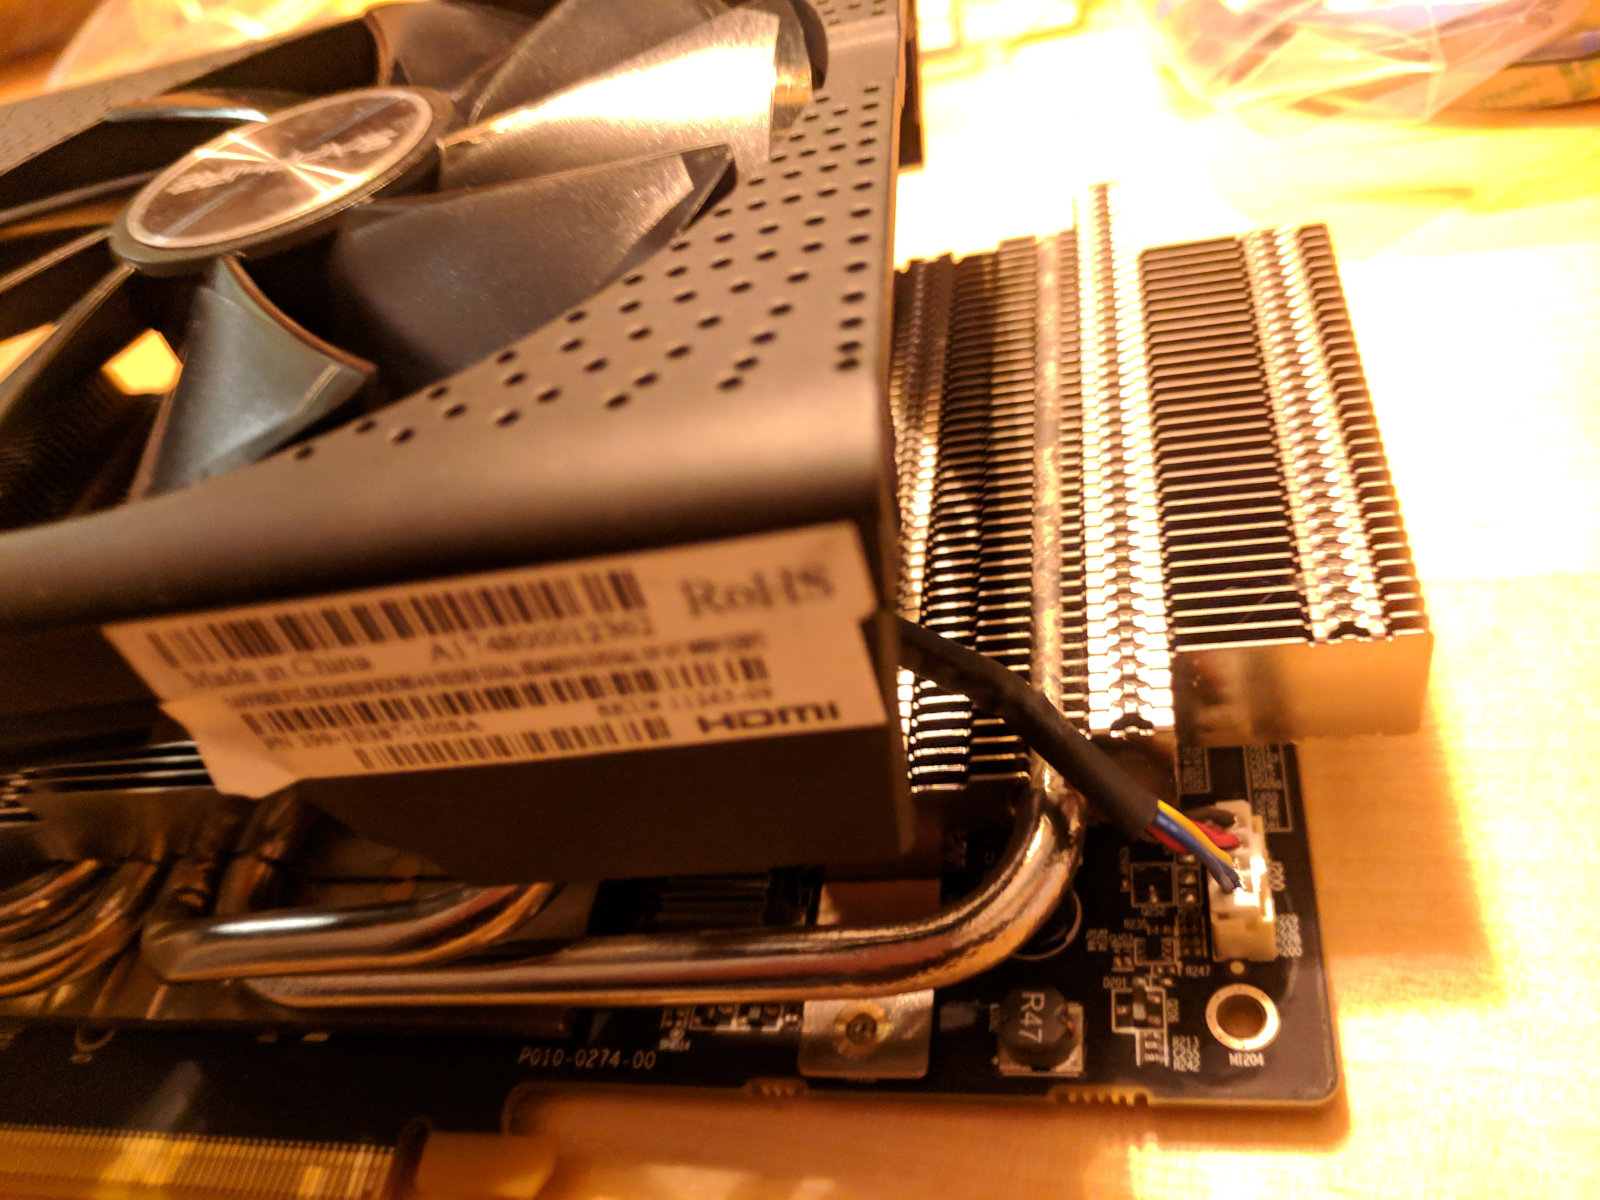
The mosfets of the VRM should be covered by the small VRM heatsink that comes with the box.
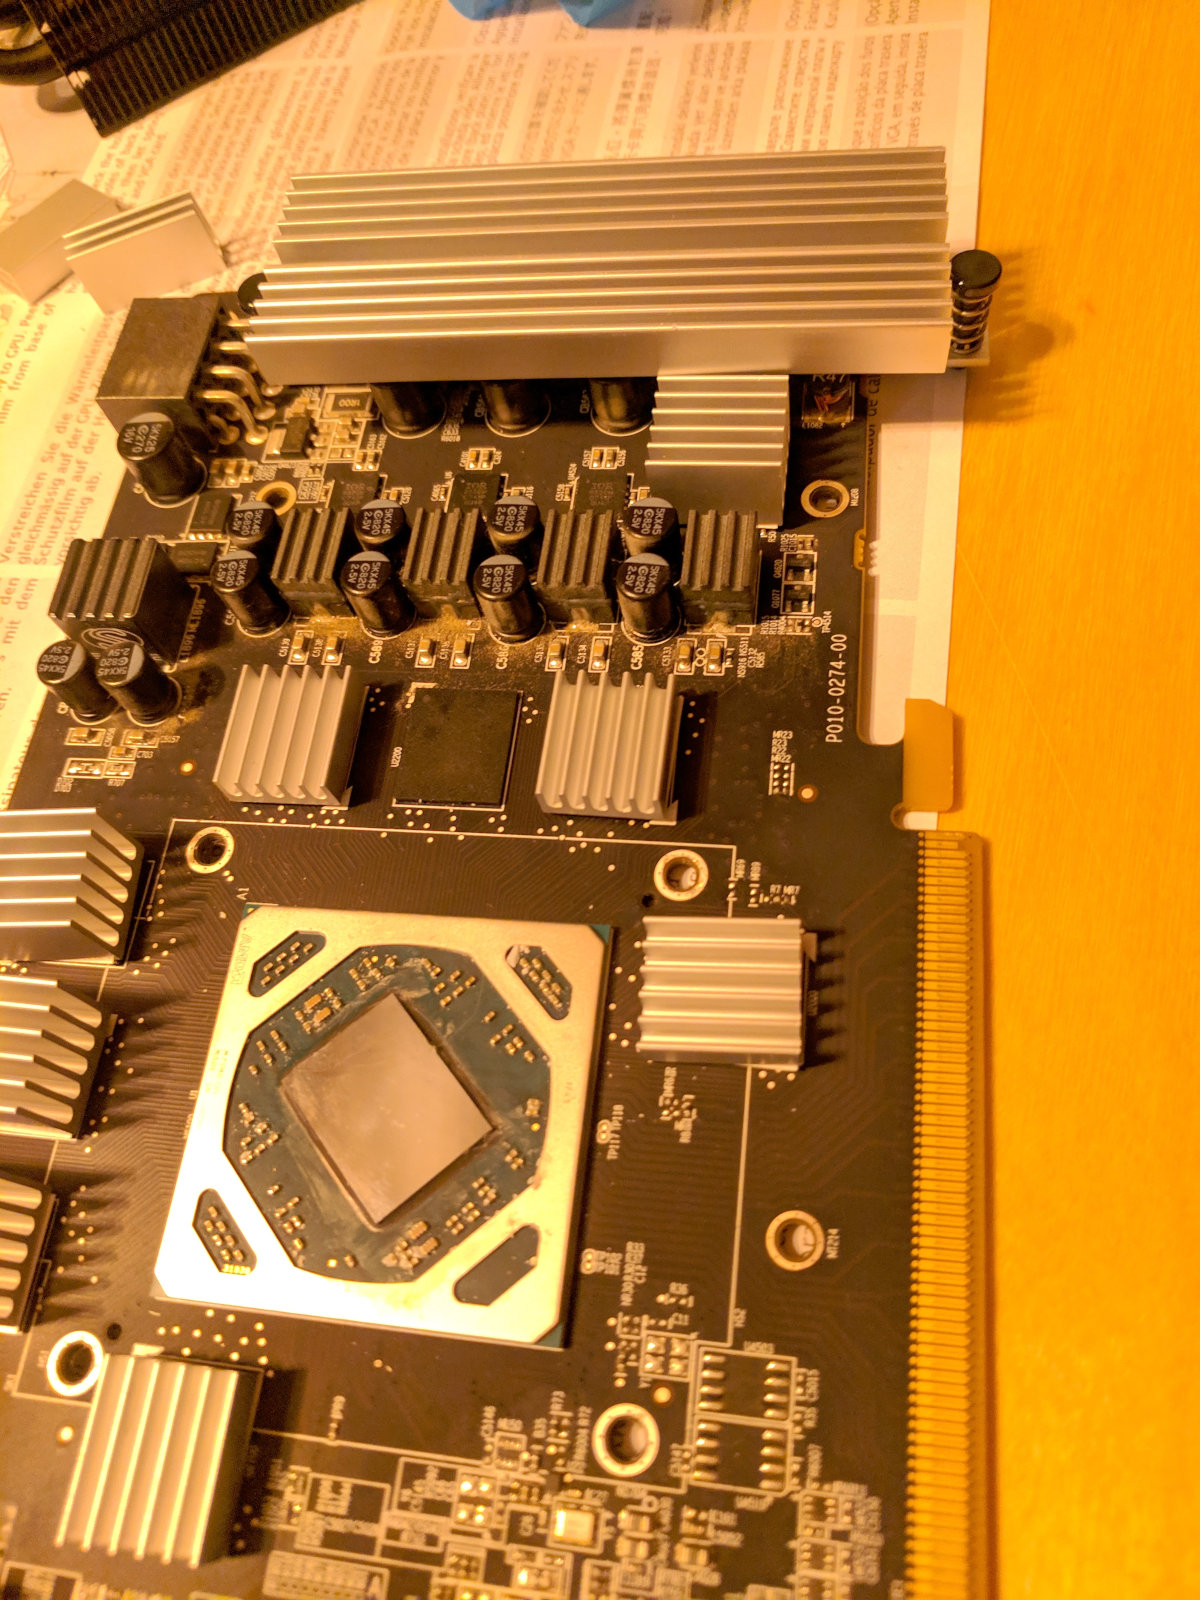
In the case of my RX 580 this does not work: The heatsink is just too long.
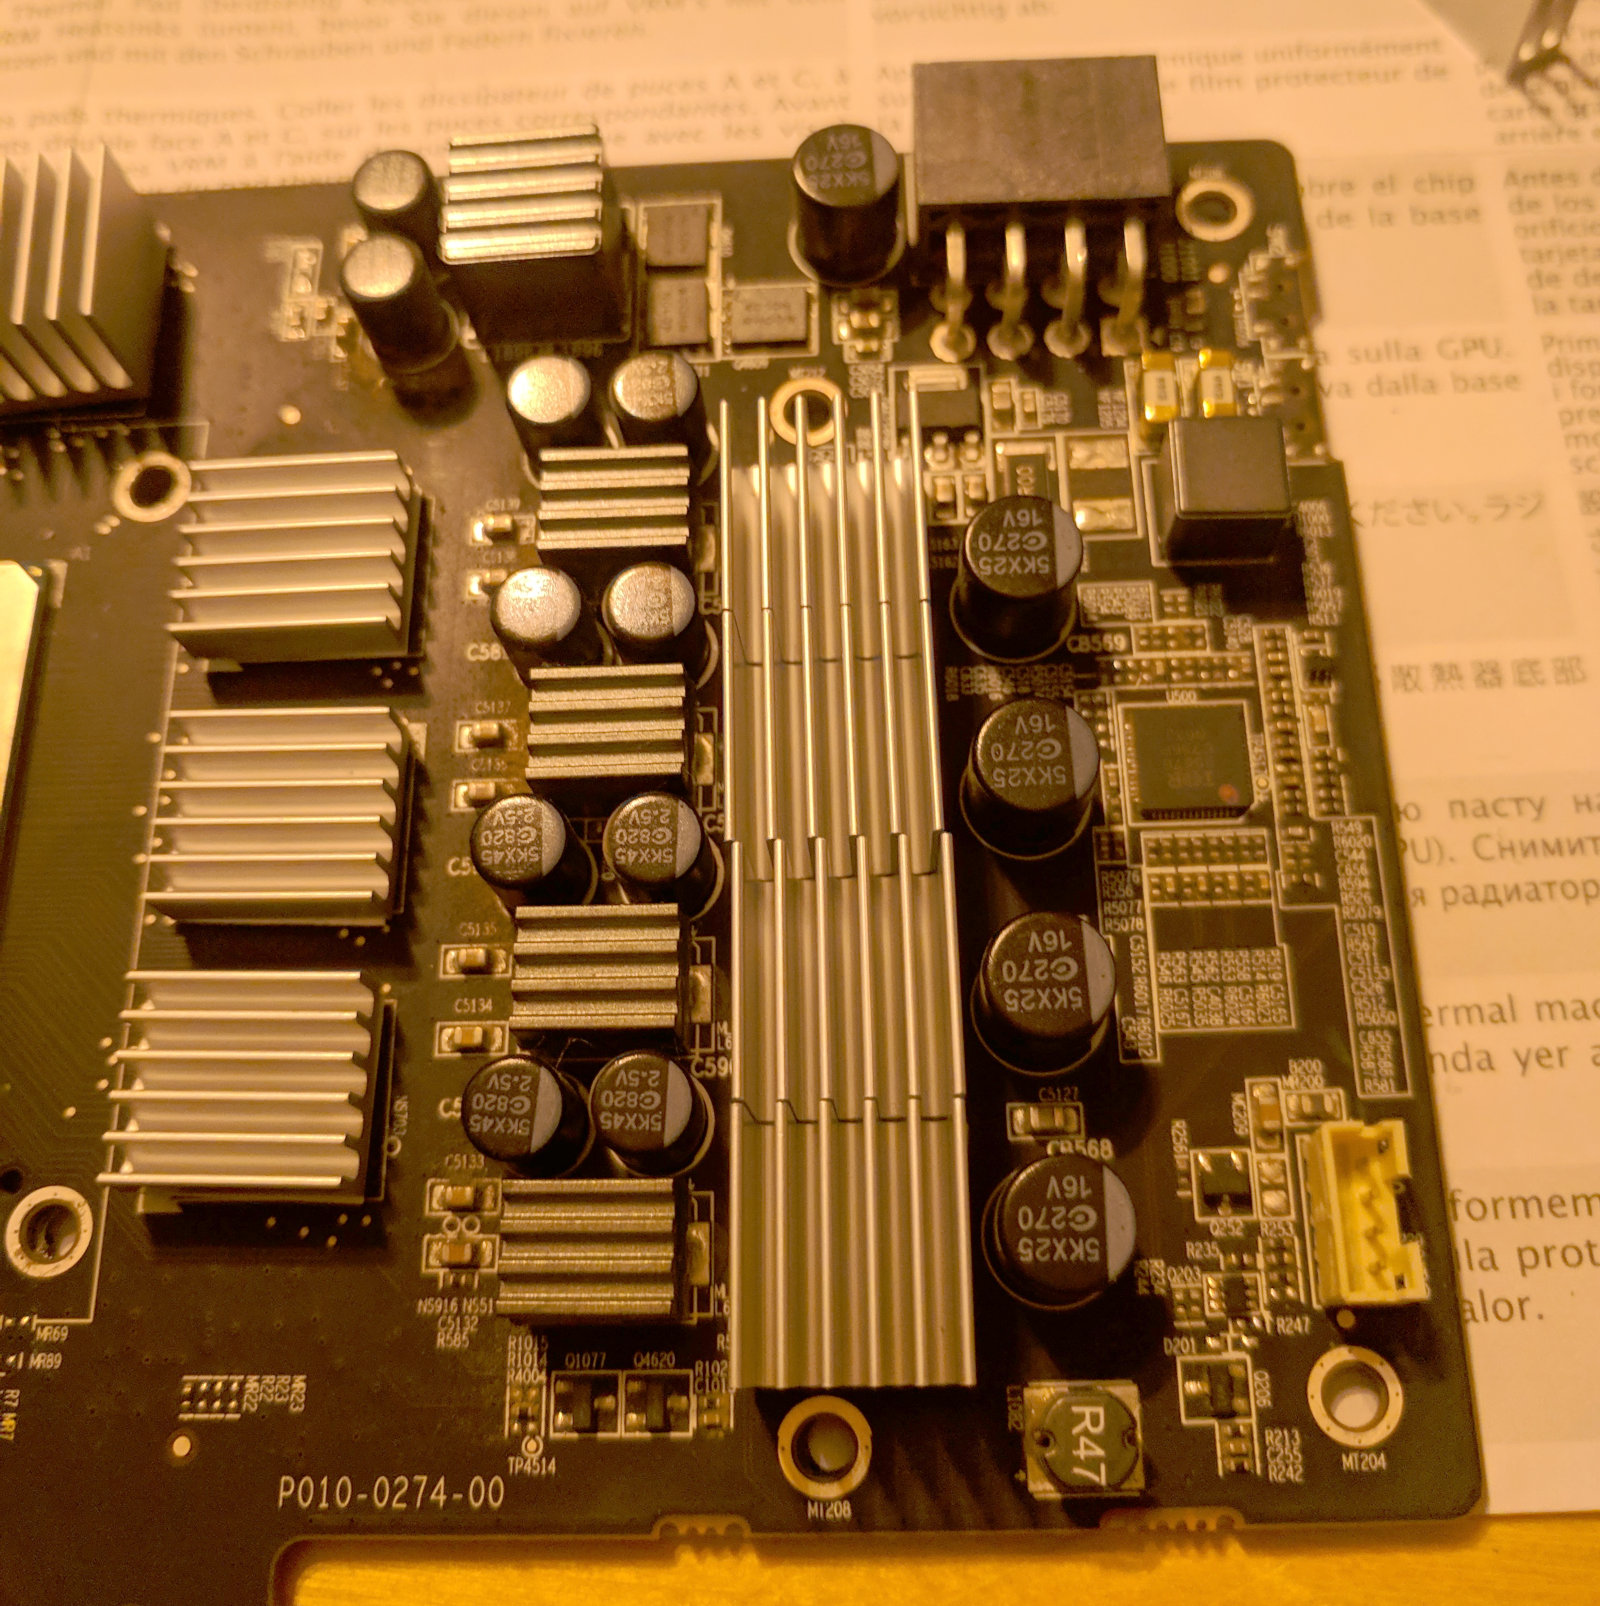
After realizing that no one sells a fitting VRM heatsink I used some of the smaller heatsinks instead and hoped for the best - the tape does not hold very strongly here, and it would have been better to use the provided VRM heatsink, as that one ought to connect to the Morpheus cooler later, transporting the heat more efficiently away.
At this point don’t forget to install the VGA to PWM adapter cable.
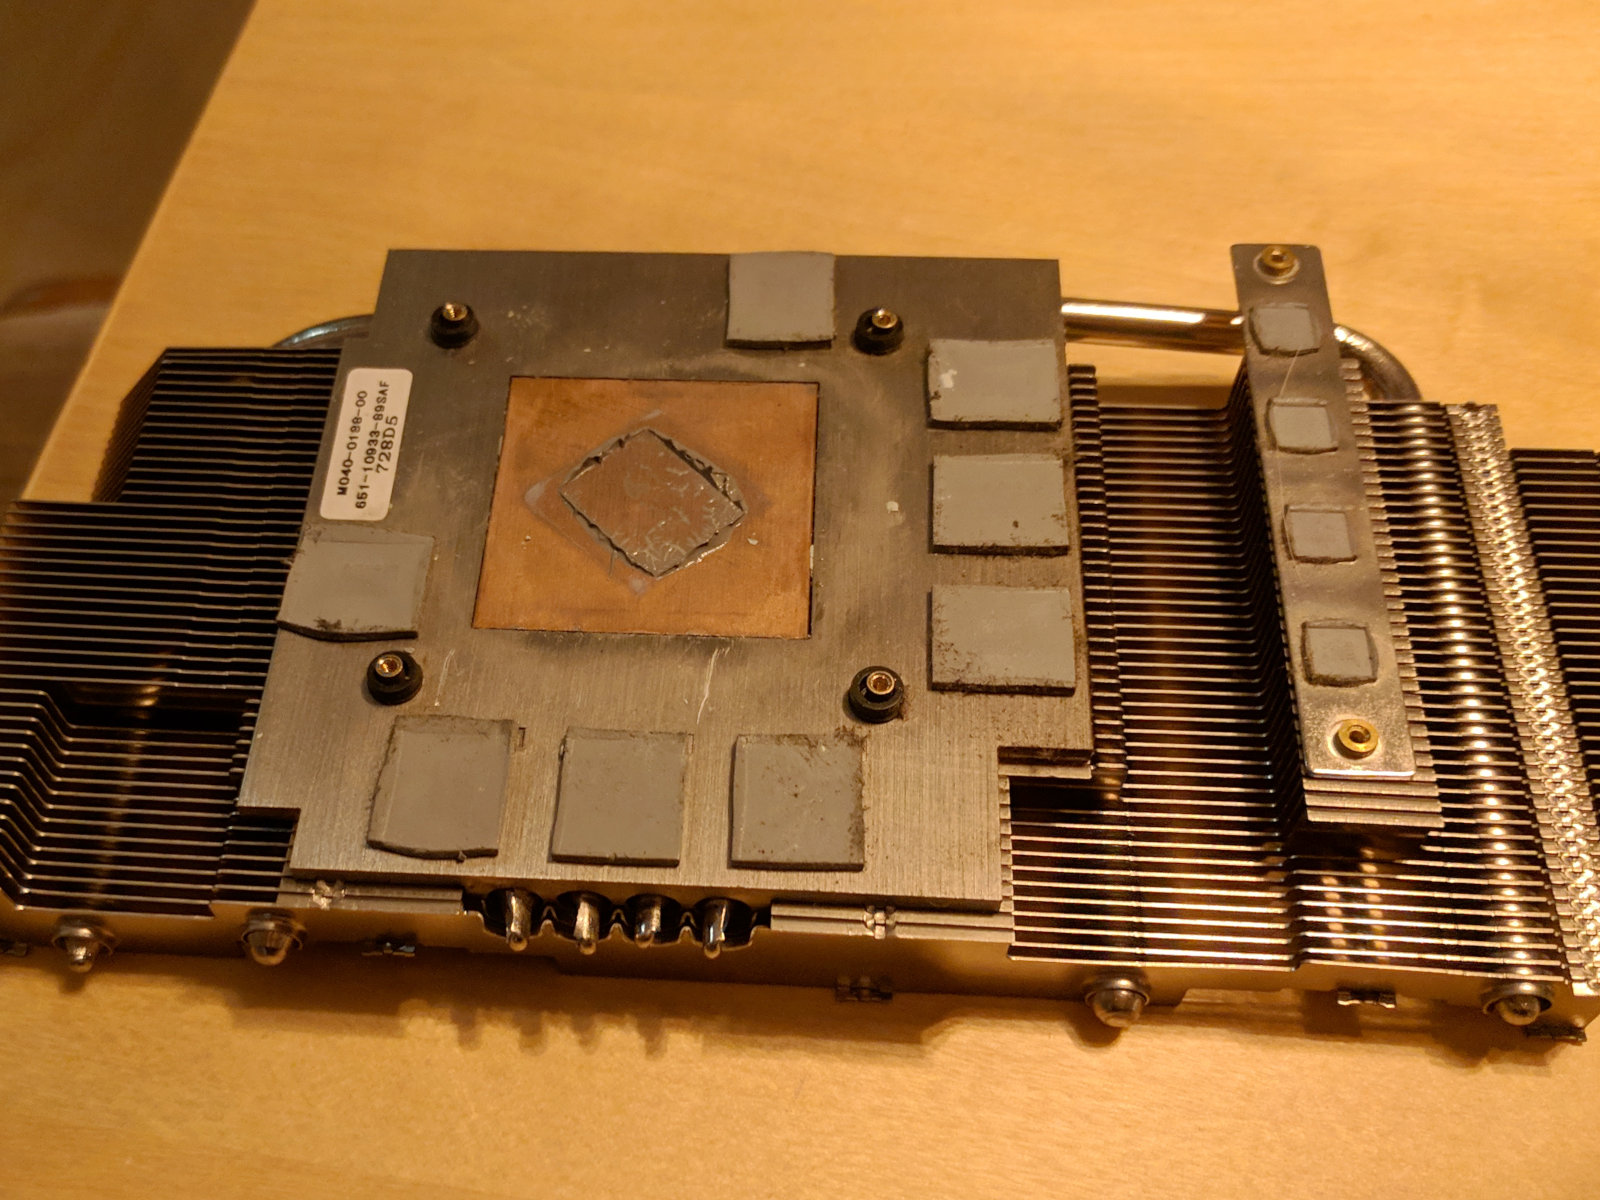
If Vram and VRM are properly covered the Morpheus II can be installed. First step is to apply thermal paste on the core. I used a different one than included because it was already open, the difference should not matter. Then I put the heatsink on the table and moved the gpu to the right position, so that the screws holding them together would fit into the bracket with the coupling nuts installed above.
But what about the backplate? The Morpheus comes with that metal X that can hold the heatsink to the gpu, like a mini-backplate. The manual makes no mention of what to do with the real backplate, according to the diagrams it just gets left off (or rather: never existed).
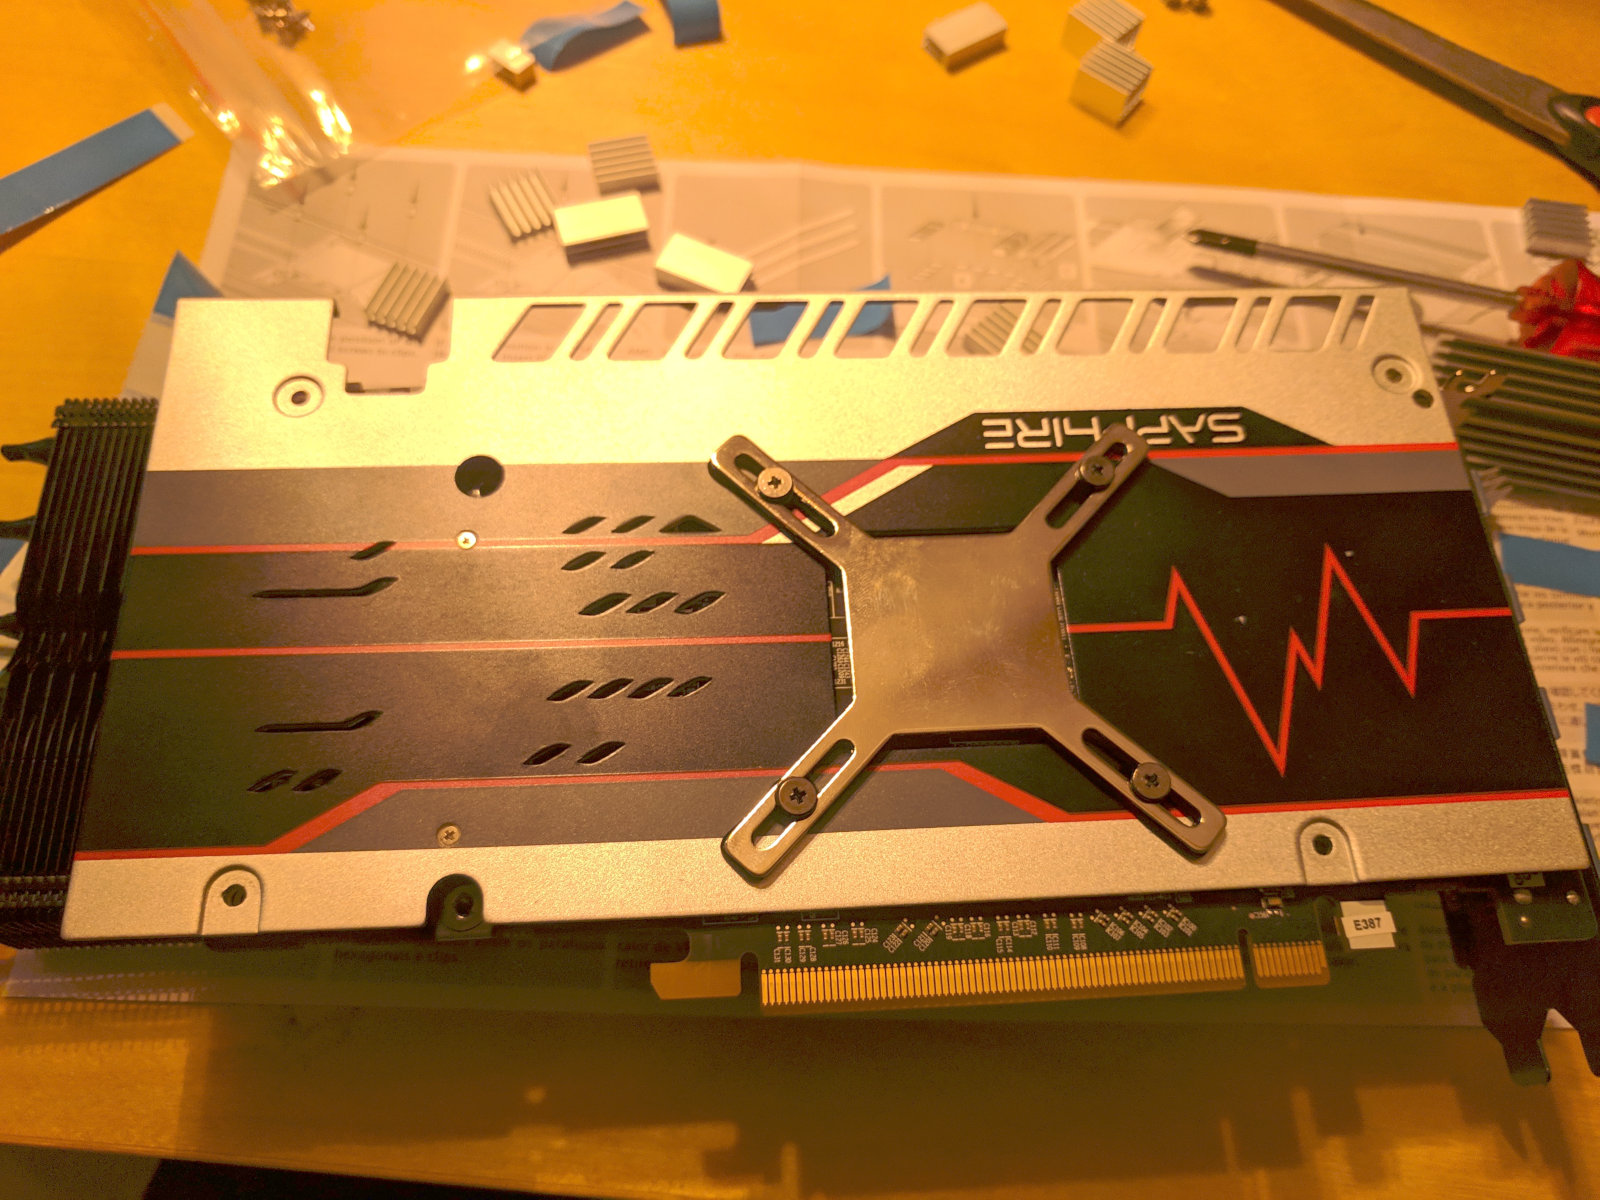
For the RX 580 Pulse I instead opted to use the metal X and the backplate together, with the backplate touching the gpu and the X coming on top of that. The screws that before hold the stock heatsink are longer than the screws that come with the Morpheus II, they were long enough to connect both the metal X and the backplate to the heatsink.
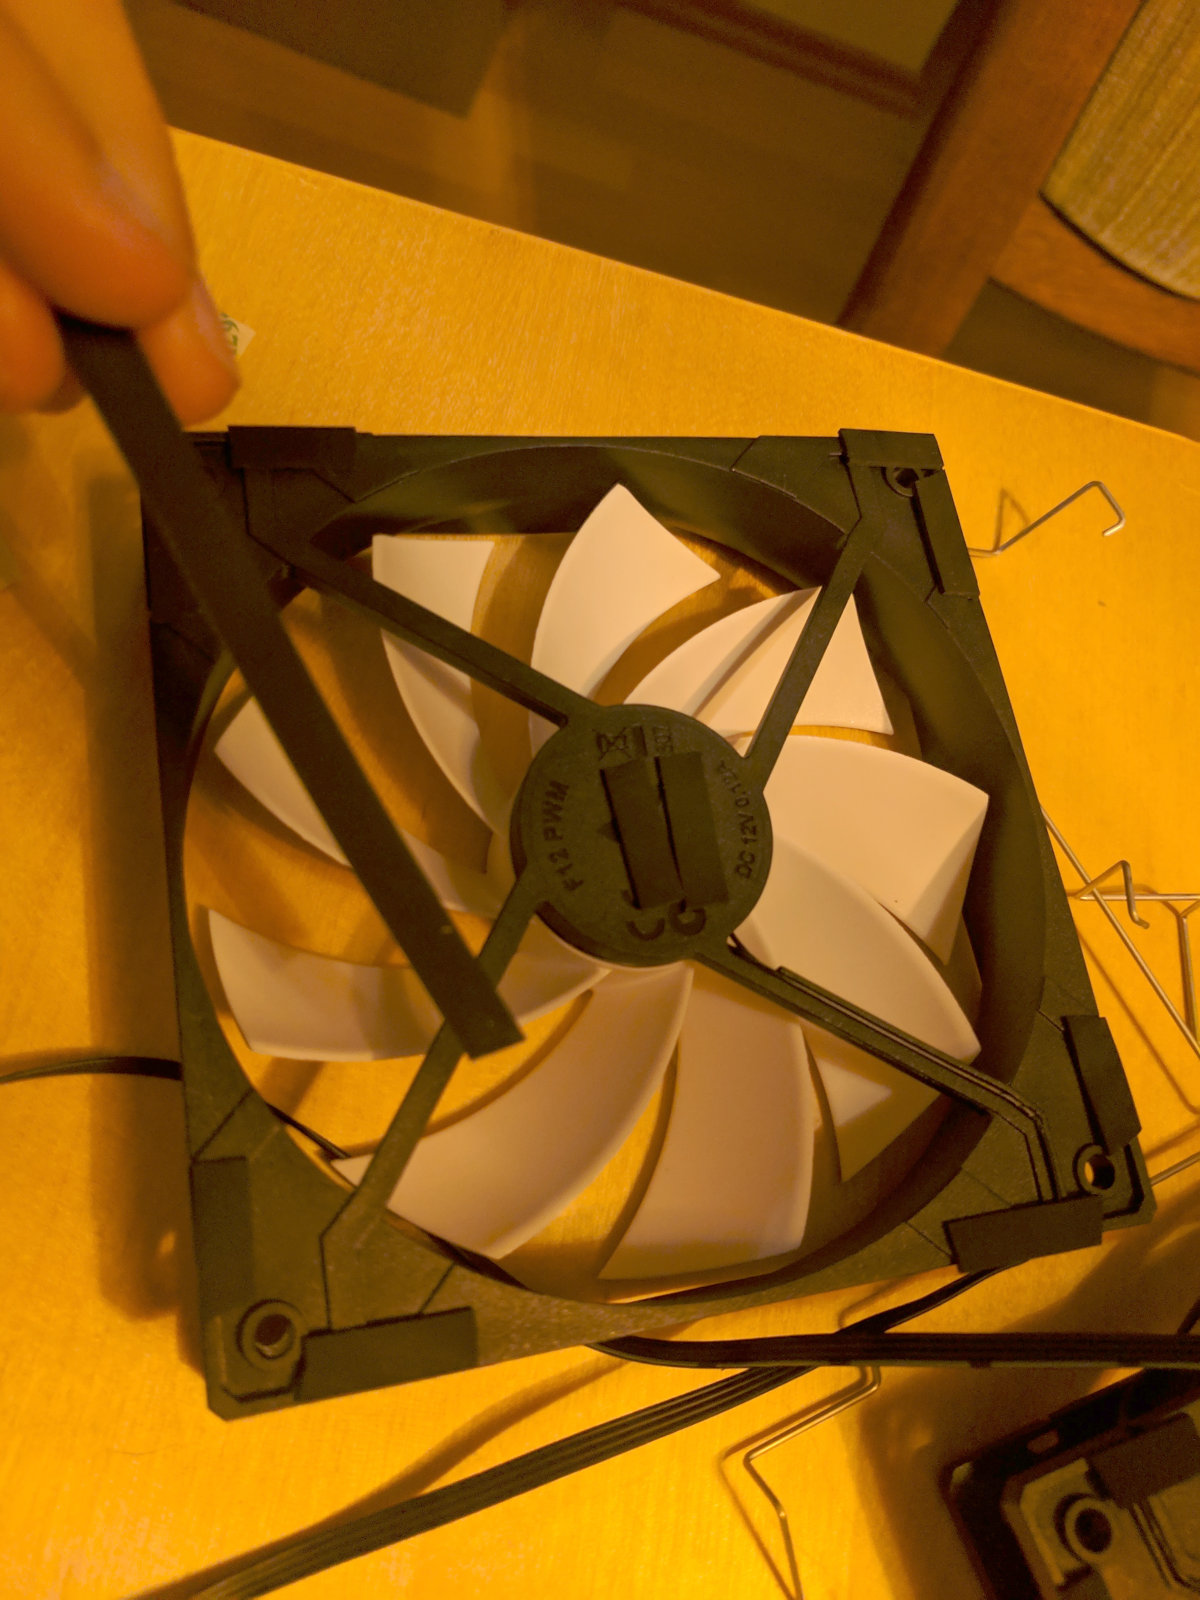
To prepare the fans for installation I glued the fan tape to the plastic bracket, where that would touch the heatsink later. I also put some between the two fans, to make sure they can’t produce noise by vibrating against each other.
Afterwards I put the fans on top of the heatsink… and then needed a moment to figure out how the metal brackets work. Again the manual is pretty hard to decipher, the images too small. The metal brackets work like a lever or a rocker, by pressing on the extruded part the parts closer to the heatsink can be pressed into a small gap in the middle of the heatsink. After understanding how that works it’s actually not hard, and the fans seemed to be properly installed afterwards. It’s a smart solution, similar to how Noctua coolers hold their fans, but a bit easier to install.
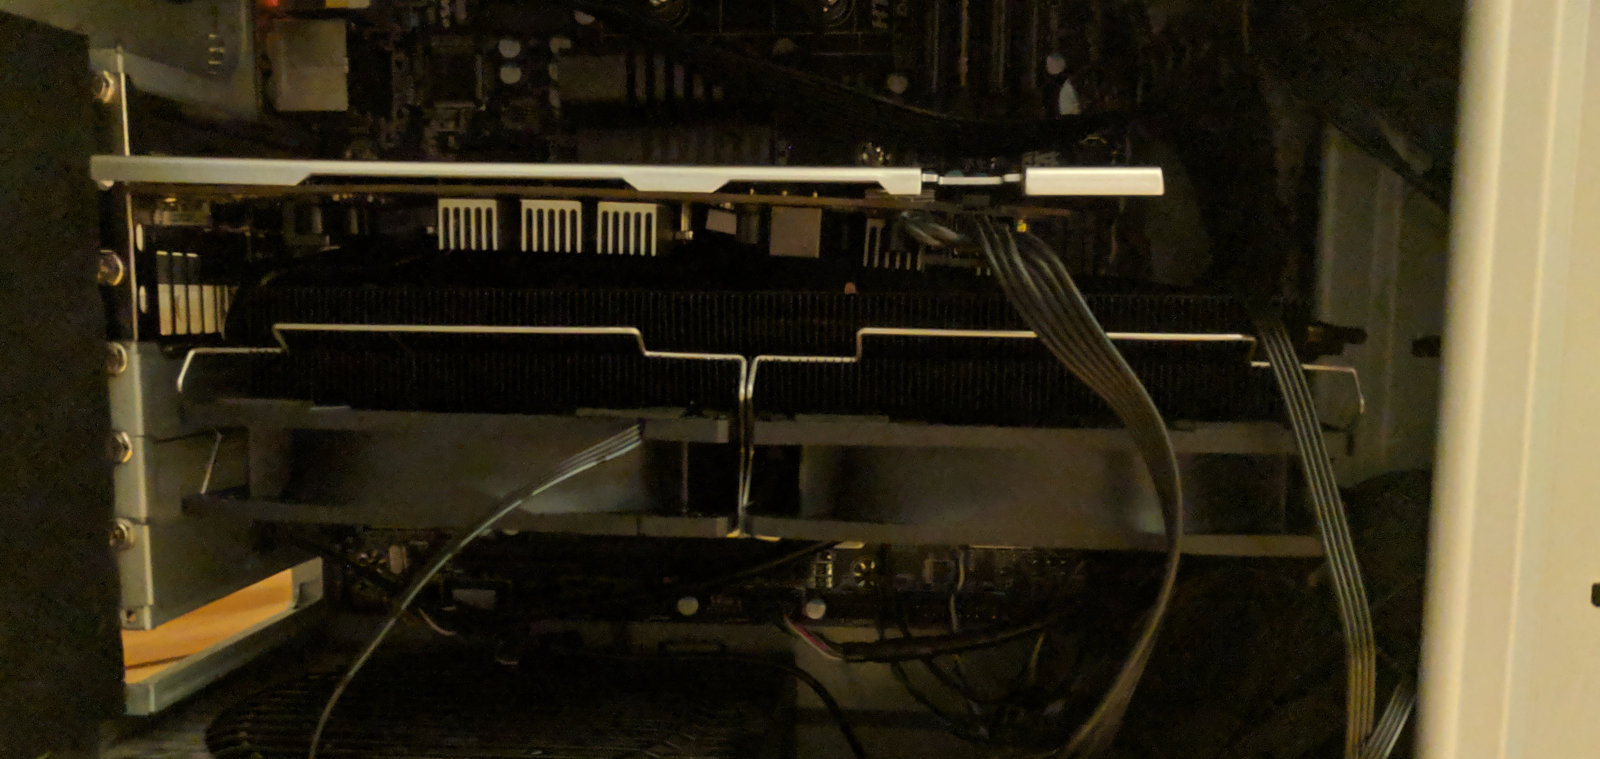
You end up with a strange looking gpu that looks like it has an oversized heatsink. Which is accurate, it really is big: While regular gpus use 2 or 2.5 PCI-E slots, a gpu with the Morpheus II and regular case fans installed will need 4. It is also longer than the card was before, only barely fitting into the case.
Noise and Temperature
The big cooler also had a big effect on noise and temperature. Listen yourself:
Recording before:
Recording with Morpheus:
That’s while playing Witcher 3 with the same fan curve.
I should have used a better microphone, but the difference is very clear: The regular cooler was louder than reasonable, louder than normal. The Morpheus II is the contrary, it is very very quiet. The noise it emits depends of course partly on the fans used, as they produce the noise. But it is to a big part the heatsink that defines how many RPM are needed and thus how loud the fans are. The fans can turn slowly if the heatsink is efficient and cools well.

Exactly that happens with the Morpheus. While before in Witcher 3 the card reached 77°C in the test case despite the fans running almost at max speed (like said, not completely normal behaviour) it now reached 57°C. That’s very good, good enough to change the fan curve and make the fans spin even slower and quieter.
Conclusion
The Raijintek Morpheus II Core Edition holds its promise: It is a very good cooler that can make a huge difference in terms of temperature and noise. It is way better than the stock cooler normally used with graphics cards. For an expensive card that would otherwise be too loud or too hot it is an excellent option.
There are drawbacks though. It is heavy (compared to the default coolers) and needs a lot of space. It is also expensive: ~70 USD or Euro plus the money needed for the two case fans and the cables to connect them, that easily adds up to 100 bucks. That’s a lot, and it makes the Morpheus unattractive when thinking about installing it on a new card. It will almost always be cheaper to get a better card instead that already comes with an acceptable cooler. Even if that cooler will not be as good as the Morpheus II.
But the biggest drawback is the manual.
I understand that this is not a product for beginners, someone new to building PCs hopefully won’t start his first build by ripping his gpu cooler off and trying to install a cooler like the Morpheus II. But even more experienced builder would profit from getting a better manual, with bigger diagrams that better explain how to install all the parts, and that also explains in detail which components of the gpu (like mosfets etc) should be cooled with a separate heatsink.
Compatibility is also problematic. Though it must be said that Raijintek never claimed it would work with a RX 480 or 580, also the RX 470 and RX 570 are not listed in the compatibility list. For Vega there is a specialized version. Issues like the VRM heatsink not fitting are less likely to occur when getting a card from a series that is officially supported. But if all needed to support those AMD cards is to add a smaller VRM heatsink and one very low Vram heatsink one has to wonder why those parts are not included already - at least optional, at an additional cost.
The Raijintek Morpheus II Core Edition can be worth it: Either if reducing noise is of the highest priority, or if a broken cooler has to be replaced. But as it is very big, quite expensive and not easy to install it is not for everybody.
Very nice and informative review, thank you for sharing with us!